If you’ve got a room with a low ceiling, then a low-profile ceiling fan is your best option. Building codes require a minimum of 7 feet from the floor to the blades of the ceiling fan. That means a room with an 8.5-foot ceiling will require one of the best flush-mount ceiling fans to provide warming or cooling benefits.
For rooms with a ceiling lower than 8.5 feet, belt-driven ceiling fans and other vintage ceiling fan ideas may still bring you into the expectations of the building code.
Which Flush Mount Ceilings Fans Are the Best?
On first glimpse, many of the flush-mount units seem to have a similar design. After all, since these fans are ceiling huggers, there is only so much one can do with the fan. As you look closer, however, you’ll see a variety of blade designs that can make a big difference in your airflow measurements. These are the top-rated models to think about installing in your own home.
Why Choose a Flush Mount Ceiling Fan?
Low-mount ceiling fans have no space between the motor housing for the fan and the ceiling. If you live in a smaller space, especially a condominium or an apartment, then you can still get the extra airflow in a room without endangering yourself with an impact like you would with a traditional ceiling fan.
Although these designs are rated for low ceilings 8 feet high or lower, you will need to check the building codes for ceiling fans before completing your installation. Some installation locations may have higher requirements. For example: a ceiling fan that is installed above a spa or a patio or porch often has a minimum height requirement of 7.5 feet, along with GFCI protection.
Above a pool, the building code for a ceiling fan is often 12 feet.
Some building codes eliminate the “blade measurement” for coding and instead measure from the floor to the lowest portion of the ceiling fan. That is often the light kit and 7 feet is often required for this code as well.
Close-mount ceiling fans can also be installed almost anywhere. As long as there are 18 inches of clearance to the walls, you can safely install the fan.
Advantages of a Flush Mount Ceiling Fan
- They are just as easy to install as any other ceiling fan. As long as the electrical box can support the weight of the fan, most homeowners can install their new product in 1 hour or less.
- There are fewer steps to the installation process. You don’t need to worry about the down bar, for example, or worry about threading your wiring through multiple steps.
- You can still have the advanced features with this type of ceiling fan, such as a remote control or multiple speed options. LED lighting is available on some models as well.
- Multiple size options are available. Fans from 30 inches to 84 inches can be found in this category so that almost any room can benefit from having a ceiling fan.
- They are priced competitively to other ceiling fan categories.
- There are damp-rated ceiling fans in this category for installations near bathrooms, patios, or kitchens where there is a high likelihood of moisture contact.
- Cleaning isn’t difficult either. The same process to clean the blades and assembly in other fan categories is used for this design.
Common Issues with Flush Mount Ceiling Fans
The #1 complaint of a flush-mount model is that it doesn’t move the same amount of air that a traditional ceiling fan design typically provides. From a generic standpoint, these is true. When there are 8 inches of space between blade and ceiling instead of 18-24 inches, there isn’t as much room for air to circulate.
That is why blade design is such an important topic to consider when shopping for the best flush-mount ceiling fans. Here are some design considerations to look at to counter this common issue.
- Blade Pitch. Many ceiling fans in this category offer a blade pitch that is around 10 degrees. That allows the fan to spin quickly, but not move as much air. Look for a ceiling fan with a pitch of 15-20 degrees to move more air and make sure the fan motor can support the steeper pitch.
- Blade Width. Ceiling fans with excessively wide or extremely narrow blades will minimize the amount of air being moved.
- Motor RPM. RPM stands for “rotations per minute.” It is an indication of how fast the fan motor will spin the blades. Faster speeds can generate more air movement when combined with the steeper pitch of a blade.
Another common issue with flush-mounted ceiling fans is the amount of heat they generate while operating. The fan motor is close to the ceiling, which negates the amount of cooling room available to it. Many of these fans have light kits that can generate heat with certain bulbs as well. That heat can affect the paint, drywall, wiring, and structural components of the home if left unsupervised.
Flush-mount ceiling fans (or any ceiling fan, for that matter) in a small bedroom with bunk beds are a bad combination. If the blades of the fan stretch over the bed, it is an unsafe installation and an alternative option should be considered.
Cost Expectations for a Flush-Mount Ceiling Fan
Although there are fewer components to these designs, there are advanced design concepts used to ensure high airflow levels. Ceiling huggers are therefore priced in the same range as any other household ceiling fan.
Expect to pay between $100-$150 for a flush-mount ceiling fan with a light kit. Premium models are priced in the $200-$350 price range for the most part. Much of the price determination is based on the quality of the finish and the materials used in the product manufacturing.
Some entry-level models in this category are priced at $50 or less. Although these fans tend to be less than 52 inches in diameter, they still maintain a good airflow rating when installed in a smaller room.
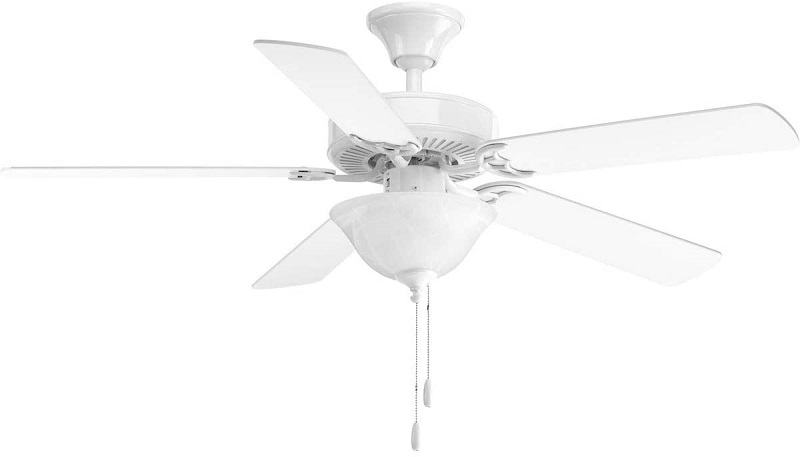
Flush Mount Ceiling Fans: Our Reviews
Emerson
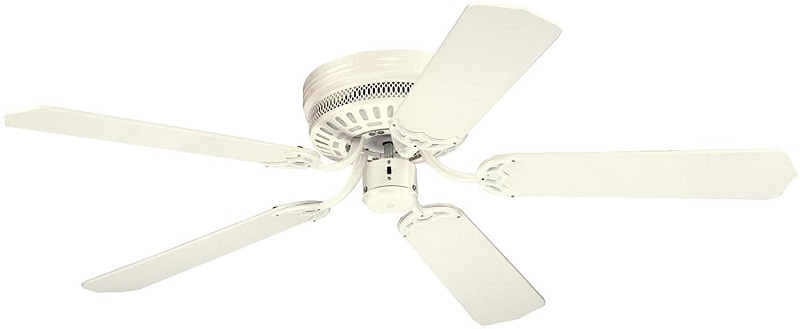
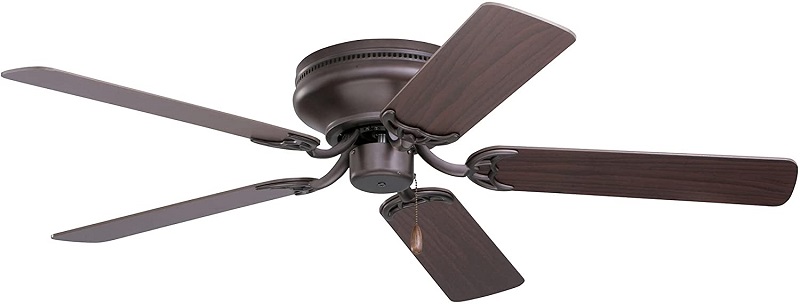 In total, you’ve got 7 inches from the ceiling to the blades once you have this ceiling fan installed. There’s no real way to improve upon that spacing. If you have a room with a ceiling that is lower than 8 feet, you’re probably not going to want to use this ceiling fan. It would be likely run afoul of local building codes if you did. Control the ceiling fan by using a standard pull-chain toggle switch. You have access to 3 speed settings from this switch. If you wish, the installation can include a light kit and a wall control, though these are sold separately from the ceiling fan.
Click here to find the best price on Amazon.
Casa Vieja
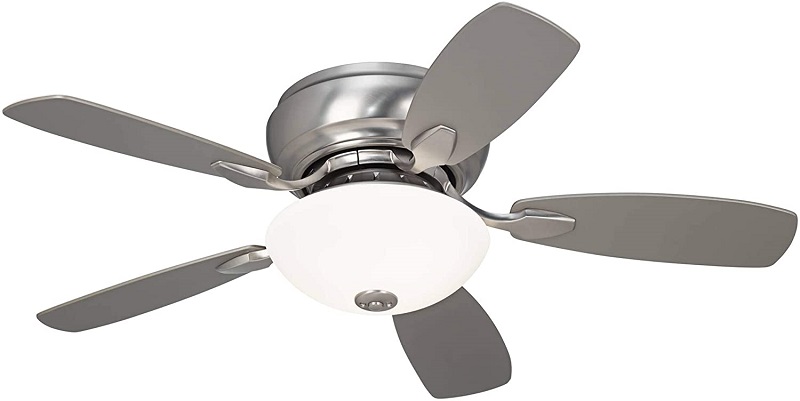 The quality of the air movement is excellent. The amount of light that is distributed from this fan, however, could be a little too dark for some homeowners. Its design accommodates the standard socket, so minimum wattage issues can occur with this fan. Halogens work better than LEDs or CFLs. It offers a 14-degree blade pitch for maximum air movement and works with a pull-chain operation.
Click here to find the best price on Amazon.
Minka Aire
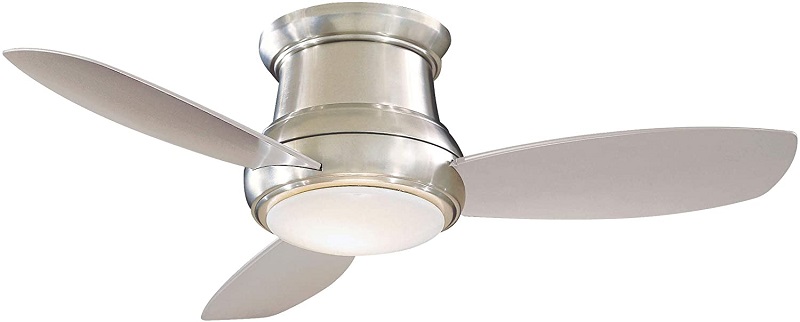 You can use this ceiling fan with a wall control if you prefer. It is sold separately from the fan, however, and availability may be limited. If you do use the wall control, we found that a GFCI faceplate worked well with the mechanism. Although there is some noise pollution with this ceiling fan, Minka Aire has eliminated the bothersome hum that has plagued other models within their line of products. You’ll still hear the air movement from the blades spinning, but you won’t hear the motor humming along in the background if you’ve installed the fan correctly.
Click here to find the best price on Amazon.
Westinghouse
 The installation process for this ceiling fan was a bit more challenging than some others. You’re provided a 12-inch lead wire only, so you’ve got virtually no room for error with this model. Take some time, get your tools ready in advance, and be patient with yourself. It took us about 60 minutes in total. Once you finish the installation, there is a tendency for the motor to hum a little bit as the ceiling fan begins to warm up. When the fan reaches the intended speed, the humming noise tends to fade away.
Click here to find the best price on Amazon.
Hunter Fan Company
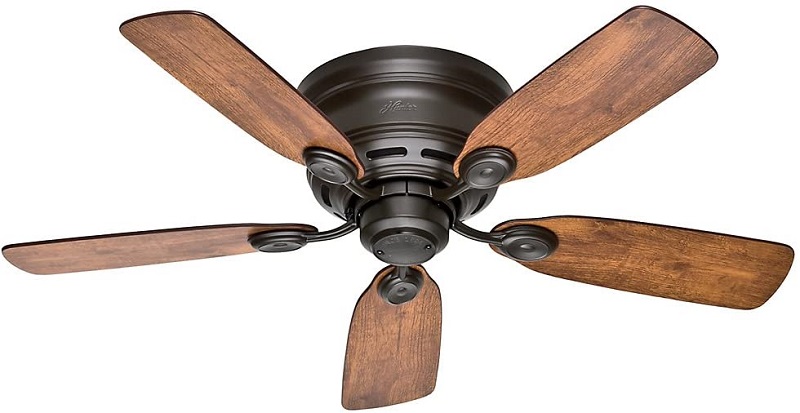 Low profile ceiling fans have certain challenges to their design. They must move air efficiently, be reasonably quiet, and not overheat. To solve those issues, some manufacturers have adapted to a “low profile” design instead of a true ceiling hugger design, but you can’t tell the difference with this fan. As an added benefit, the blades of the fan from this manufacturer are specially coated with a nanotechnology called “Dust Armor.” It is a patented technology from Hunter and it repels nearly 60% of the dust build-up that other ceiling fans experience.
Click here to find the best price on Amazon.
The best flush-mount ceiling fans can give you the benefits of air circulation in difficult-to-install locations. Although this is one of the more challenging categories of ceiling fan, they work well in challenging spaces. Match up fan features to room needs and you’ll find a perfect make and model that will work with you all year long.